Monday, April 12, 2010

Sophia Coco Turns Three

Happy Third Birthday, Sophie! My how you've changed!

Sophie - Thirteen Days Old


Sophie's First Birthday


Sophie's Second Birthday


Sophie's Third Birthday began with Daddy taking her to the donut store for a breakfast date - no sisters (or Mommy)!


Next, Sophie opened some presents


Then, she met her buddy, Will, at the Bouncy Barn to jump on inflatables.
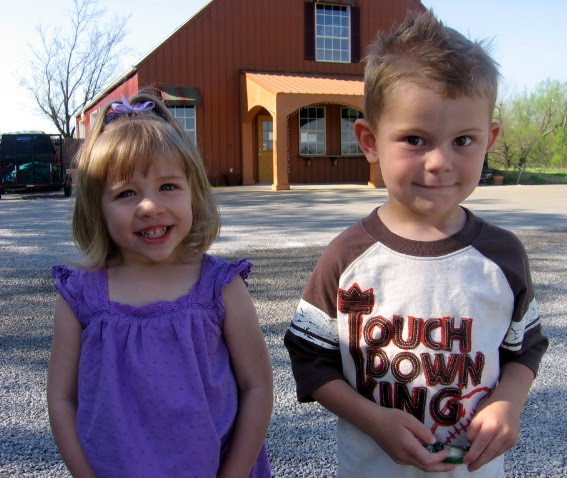


Sophie cried a little when we left the Bouncy Barn because she wanted to play together with Will all day. She got over it as I drove to Hideaway Pizza though. This was a lunch date just for Sophie and Mommy - no sisters (or Daddy)!


After lunch, Sophie played at the park.


Sophie wore the princess accessories Will's family gave her for her birthday gift. She twirled around and danced for an hour and kept the jewels/tiara on the rest of the day.


Following a nap and dinner, Sophie opened more presents.


And finally, we ate birthday cake. She requested pink cake and icing. I made her a strawberry cake and marshmallow creme-based icing tinted pink. Sophie's Daddy always requested strawberry cake when he was a little boy.


Sophie ended a wonderful day of celebrations by falling asleep in her new pj's.


Happy Birthday Sophie! I love you so very much. Even though you are the oldest, and just turned three years old today, you will always be my baby!

Thursday, April 8, 2010

Organized Pantry

My friend, Kate, requested a photo tour of my pantry because she thinks it's organized and neat. I didn't think it was anything special, but here you go, Kate!


In my pantry everything has its designated spot. I pulled out some of the containers I use so you can see them. I purchased them at Target. I put baking goods and tea packets in the glass canisters. I group my rice packets together in a plastic basket. Another basket has snacks, another pastas, and another groups things like breakfast bars and granola. I store animal crackers, long grain rice, goldfish crackers, etc. in the large pourable plastic containers.


My pantry resides in the corner of my kitchen, so it has a deep corner. I fill the corner with square items, like boxed chicken broths, aluminum foil, or a square storage basket.


I keep my frequently used, appliances on the lowest shelf. I keep things we rarely use up on the highest shelf (although you can't see the top shelf in this picture, we have a beef jerky maker/food dehydrator stored up there that my husband just had to have. We've used it once...in three years - ha).


We store paper plates, plastic ware party supplies etc. in the three drawer plastic chest. It's a great way to use up all of that wasted space beneath the lowest shelf. I hang my aprons on a cup hook I screwed into the wall. We keep our shredder in our pantry next to the trash so we can easily shred junk mail with our info on it (like credit card offers) and throw the harmless junk mail in the trash.


I collect my plastic Target and Walmart trash sacks in the animal print bag. We use these sacks up all the time as small trash bags for the twins' diapers, trash can liners, trash sack for the car, etc. The broom and dustpan are conveniently stored and ready to be used (after every meal and most snacks). Three little kids sure can make a mess on the floor.


That completes the tour of my pantry. What do you do to organize your pantry or cupboards?

Sunday, April 4, 2010

Easter 2010

This morning we thoroughly enjoyed our church's Easter message. It was so nice to hear my almost three year old singing Bible songs and telling me Jesus loved her when I picked her up from her class.

My family gathered at my brother's home for Easter lunch. Sophie participated in her first Easter egg hunt. She thinks chocolate is the best treat in the world. It was a delight watching her have so much fun playing with her cousins.

I am thankful for this beautiful day spent with family. I'm thankful for health. Most of all, I'm thankful for a God who loves us, and a Savior who was obedient unto death - for us. I won't take His sacrifice in vain. Here's to abundant life in Jesus!

Wednesday, March 17, 2010

Corn, Black Bean & Avacado Salad

I serve this corn, black bean & avacado salad with my crock pot chicken fajitas and homemade restaurant style salsa.


Corn, Black Bean & Avacado Salad

1 can black beans, drained and rinsed
1 1/2 cups frozen corn, thawed
1 avocado, pitted, peeled and diced
2 Roma tomatoes, seeded and diced
1 cup (or more) cilantro, chopped
2 green onions, diced
Pinch of salt
Juice from 1/2 a lime
Drizzle of olive oil

Mix all of the ingredients in a bowl. Chill in the refrigerator for at least an hour.

Homemade Restaurant Style Salsa

1/2 of an onion, diced
1 can whole tomatoes
1 can mild Rotel
1/2 teaspoon prepared garlic or 1 clove garlic, diced
1/4 teaspoon sugar
1/4 teaspoon salt
1/4 teaspoon cumin
1 cup cilantro chopped
Juice from 1/2 a lime

Throw everything in a food processor and pulse about
15 times - that's it. Chill in the refrigerator for at least an hour before serving.

Crock Pot Chicken Fajitas

My family could eat Mexican food seven days a week. In an effort to try something new I made chicken fajitas in the crock pot. They were delicious! The chicken was moist, not dry, and full of flavor. I served it with homemade restaurant style salsa and corn & black bean avacado salad.

Crock Pot Chicken Fajitas
3 to 4 chicken breasts, thawed, trimmed and cut into strips
1 onion, sliced
1 red pepper, sliced
1 can green chilis
1 small can sliced black olives
1 cup salsa
1 teaspoon cumin

Add all ingredients to crock pot and cook on low for six hours.

We added shredded cheese, sour cream and black olives to our fajitas.

Tuesday, March 16, 2010

Black Bean Soup

1/2 teaspoon prepared garlic (or 1 clove garlic, minced)
1/2 onion, diced
1 can Rotel
2 cans black beans, drained and rinsed
1 can beef broth
2 cups water
1 teaspoon cumin

In a saucepan, sauté garlic and onion in 1 teaspoon olive oil. Add remaining ingredients. Stir. Simmer 20 minutes. Using your method of choice (masher, submersible hand blender or regular blender) mash or puree approximately half of the soup. I stick my submersible hand blender into the pot of soup and blend in little pulses until I like the soup's thicker consistency. I leave plenty of beans intact for texture.


Garnish individual servings with a dollop of sour cream and a sprinkle of shredded cheese.

This recipe can easily become a vegetarian meal by exchanging vegetable broth for the beef broth and leaving off the cheese and sour cream toppings.

Monday, March 15, 2010

Toddler Girl's Garden Room

Sophie's garden-themed room received a little update. These paper lanterns from Hobby Lobby were exactly what her room needed.

I sewed her window treatments and matching pillows.


The activity center holds puzzles, dolls, games, and her piano. My girls' growth chart is on the wall to the right, and the bookcase is to the left.


Sophie likes to sleep in her white toddler sleigh bed.


She also enjoys admiring herself in the mirror under the garden arbor her daddy built her.


Sophie likes to read, dance, and play dress-up every day in her toddler girl's garden room.

Sunday, March 7, 2010

Bandana Skirts

A few months ago I found V & C0.'s bandana skirt tutorial here. I knew I had to make some for my three girls. I finally sewed them and think they are adorable. Yes, we live in Oklahoma, and, yes, we like some country music now and again. Yes, my oldest owns cowgirl boots, but, I think any little girl would look cute in this easy-to-make bandana skirt.


Riley is searching for crumbs under the table.


Piper is channeling Don King


You just need one bandana per skirt, elastic, and some coordinating fabric for the bottom border. It took me about 25 minutes to sew one skirt.

Friday, March 5, 2010

Ribbon Lovie (Security Blanket) Tutorial

Six of my friends just had, or are about to have, babies. I decided to make each baby a ribbon lovie (security blanket). My own girls love the ones I made for them. They enjoy playing with the ribbon loops and rubbing their hands or face on the soft minky fabric. It makes a great gift for a newborn or a 1st birthday. My oldest daughter is almost three and still cuddles with her lovie all the time.

This project will take about 30 minutes (especially if you are snapping pictures and writing notes as you go - ha!)

You need two 11" by 14" rectangles of fabric. I used navy blue flannel for one piece and light blue ultra soft cuddle fabric (minky or chenille) for my other piece.


This lovie has fourteen ribbon loops around the outside edge. Cut fourteen lengths of ribbon, 4" each. I like to mix and match ribbon colors and widths, but always use grosgrain ribbon.


Pin ribbon loops onto the RIGHT side of ONE blanket piece matching raw edges of ribbon and blanket. I spaced my ribbons at the 2", 5", 8", and 11" marks for the fourteen inch side of the blanket.


Loops should be down away from the edge of the blanket.


I spaced my ribbon loops at the 2.5", 5.5", and 8.5" marks for the eleven inch side of the blanket.


Sandwich the ribbon loops between the Right sides of the two blanket pieces. Pin right sides of blanket pieces together. You should not be able to see any ribbons.


Using a 1/2 inch seem allowance, stitch around the perimeter of the blanket layers leaving a small opening for turning right side out. After you turn it right side out, sew the small opening closed. The finished blanket will be approximately 10" by 13".


Roll it up and tie it with a matching ribbon and name tag. Smile as you enjoy the adorable gift you just made. This lovie is for baby boy, Rhett. Only five more to go!