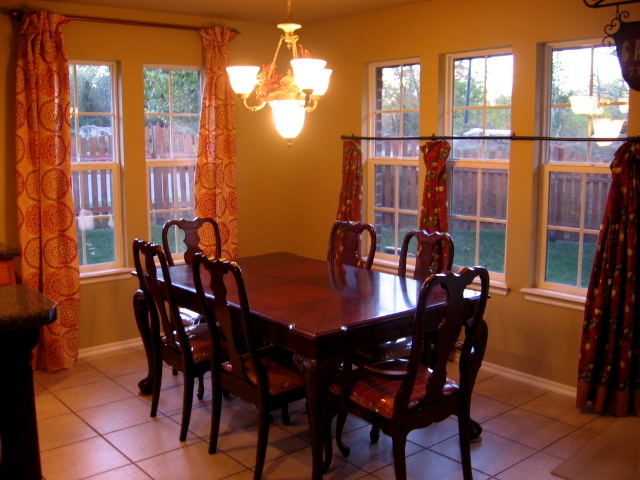
Showing posts with label Projects. Show all posts

Wednesday, January 2, 2013

Dining Room Before and After

This is how I changed my formal dining room from luscious red to aged faux.

Before


After


I used these pictures found on Pinterest as my inspiration for technique (not color):


My husband used a roller to paint the ceiling with the Behr Paint in Shelburne Buff - full strength - not diluted and I worked on the walls. First I used Behr Paint and Primer In One (Benjamin Moore color in Shelburne Buff) diluted with water and Martha (Stewart) Living Faux Finishing Glaze (clear - no color).


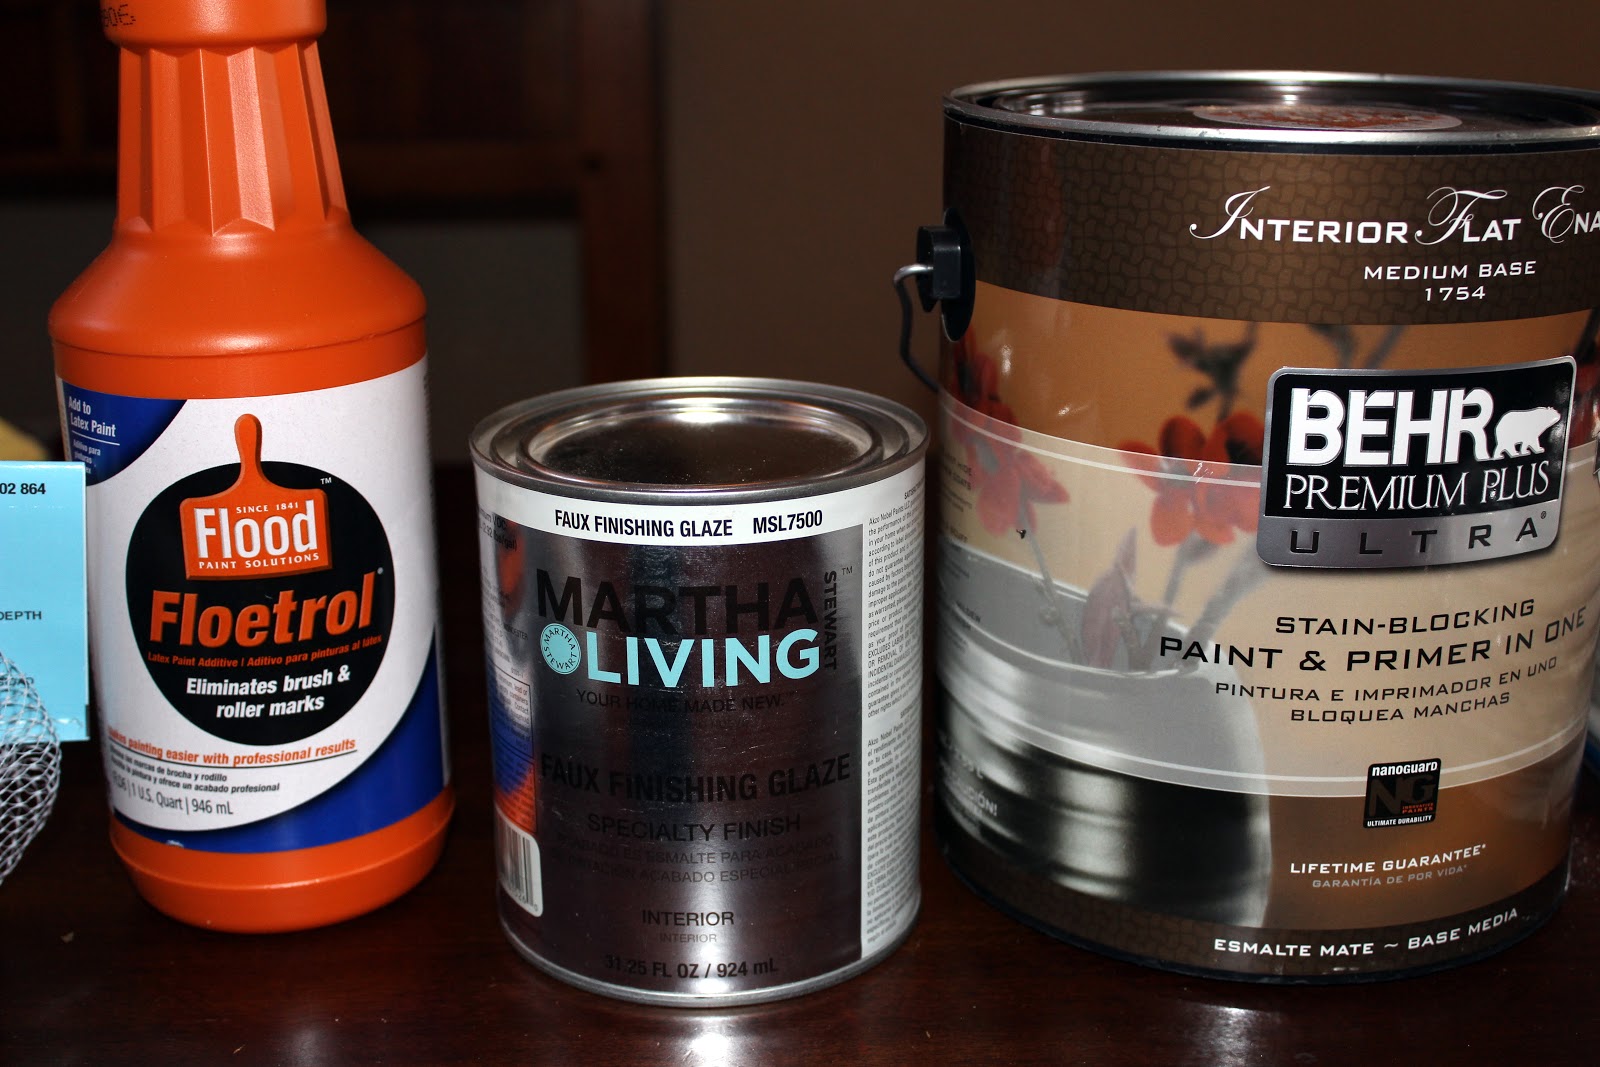
I brushed that on using a 3 inch brush. Yes, I painted the entire room with a brush. I used mostly vertical strokes with some horizontal strokes too (no diagonals, no sponge, no swirls). I was going for a very specific look. I wanted the red to peek through so I wasn't trying to cover every bit of red color.


.

Next, I hand-brushed on a layer of brown glaze. I used Valspar Translucent Color Glaze in Mocha.


This shows the buff paint/glaze layer plus the Mocha glaze layer. I also glazed the crown molding with the Mocha glaze wiping most of it off and leaving the rest in the molding details.


Finally, I brushed on a few swipes of Martha (Stewart) Living Metallic Paint in Vintage Gold mixed with the clear glaze. I didn't want the gold to overpower the rest of the colors. It was just an accent brushed on here and there to create a little more drama and light reflection.


And we ended up with this:


So, to recap --

Before - I know the red is pretty, but the light remained off almost all the time. The room was a dark, cold space and we never used it.


After - This room is being transformed into my new sewing room. It's brighter, lighter, warmer, and inviting. I basically live in this space now and love it!


Wednesday, October 24, 2012

Dining Room Transformed with New Curtains

Ten years ago I sewed these cafe curtains for our breakfast nook area. Although I liked the rust-colored fabric, it always felt heavy and dark in this space.


We lived with those curtains for many years even though they were too short. I ended up adding a complimentary fabric to the bottom so they would be the proper length. I also replaced the glass table with a larger wooden table and recovered the chairs with matching fabric.


After having these curtains for so long I was ready for a change. I wanted the breakfast nook to look brighter, lighter, and more updated. I was looking for something less traditional but still keeping within my original color scheme.

While looking at hundreds of fabrics at Joann's it was actually my five-year-old, Sophie, who picked out the fabric for our new curtains.


This fabric is heavy-duty indoor/outdoor fabric which will not fade. It was easy to work with too. For those reasons I decided not to bother lining them. I sewed four simple panels and used rings with clips to attach them to new curtain rods. The curtains rods were made from electrical conduit (really cheap and very sturdy) from Lowe's. My husband sprayed painted the rods and cheap unfinished wooden finials a gorgeous metallic bronze color. Our traditional, dark, and heavy breakfast nook was transformed into this:


The new curtains on the left and the old cafe curtains on the right


I love them! Our space seems so much brighter, lighter and more modern.


Before

After

Wednesday, September 12, 2012

Girls' Bathroom Upgrade

While perusing the aisles at Bed Bath and Beyond, I fell in love with this fabric shower curtain by Amy Butler in "Sari Bloom". It was discontinued (though you can still buy it from Amazon and Ebay), and was on sale. By using a coupon, I ended up only paying about $10 for it. The shower curtain provided the color scheme for the girls' bathroom.


Judd framed out the builder's grade plain mirror and painted it with Benjamin Moore paint in Dove White.


The bathroom used to have just a standard, plain, chrome-colored towel bar similar to this:

We wanted to make the bathroom user friendly for the girls, so Judd built them a shelf with towel hooks. He also painted it Dove White. Then, I purchased some picture frames from Target and dry brush painted them with Bubble Gum pink acrylic paint. The framed photos identify whose towel is whose.We picked up some pinkish-red towel sets from Target in Lollipop Red.


Not pictured, is the plush blue bath rug I picked up at JC Penny's home store several months ago which matches the blue in the shower curtain.

Their bathroom ended up looking like this:


I really need to buy a new camera. This looks like the towels clash with the curtains, but they don't. Hopefully, you get the general idea. Easy changes upgraded and personalized what once was a boring standard bathroom.


Wednesday, September 5, 2012

Entryway Coat Rack and Storage Bench

There are many things I love about my home, but there had been a bare space in the entryway I never did anything with until now. I had been pining over this Pinterest pin from a creative mom over at theidearoom.net. I thought her bathroom towel rack shelf would make a great coat rack in my entryway.


I decided to have my hubby make the coat rack shelf with crown molding for me because I couldn't find anything with the right dimensions online or in stores. I wanted the coat rack to be substantial and to be hung above a 3-drawer storage bench. I purchased this bench when it was on sale at Target.


I recovered the plain cushion with ultra soft cheetah fabric found at Hobby Lobby.


Judd built the coat rack using this tutorial, but altered the dimensions for a custom fit for our space. Next, we primed and painted the coat rack shelf with the same products we used on our kitchen island (shared in my post here) It's a deep, rich, rusty-red color. It only appears bright in this picture because I used the flash on my old camera. In reality, the color is more of a brown-red.


We attached these coat and hat hooks from Home Depot, and our entryway space ended up looking like this:


The girls each have their own drawer in which to keep their shoes. They feel a sense of pride in having this responsibility and Judd and I enjoy fewer tripping hazards left on the floor.


Bye-bye empty space; hello stylish organization.

Sunday, July 31, 2011

DIY Preschool Backpack - My Favorite Project Yet

My personalized toddler drawstring backpack:


In just a few weeks all three of my little girls will start preschool twice a week. I want them to have unique and personalized bags no other kids at school have. I found this toddler drawstring backpack tutorial by Liz Stanley and used it as my starting point, but made some changes.

The changes I made were:

I lined my backpacks.


I added fabric shoulder straps.


I used ribbon instead of cording. Liz's directions called for two 58" pieces of cording, but I used two 53" pieces of grosgrain ribbon on Piper and Riley's bags to see if I liked it better than the cording I used on Sophie's bag. My preference is the ribbon, but you may like the cording better.

If you want to line your backpack, simply baste 12" x 14" lining onto the wrong side of your both of your 12" x 14" pieces of fabric.


Then turn your raw edges in and sew on all four sides.


Follow Liz's tutorial for detailed step-by-step instructions. I'm just showing the alterations I made to her fabulous tutorial. There's no need for me to try to give you all the steps when she did a beautiful job already.

After threading my ribbon through the finished bag, I tied a knot in the ends and singed them with a lighter so they wouldn't fray.

 
Then, I threaded the ribbon through the lined shoulder strap (simple tube of lined fabric - baste lining to fabric. turn raw edge of top and bottom down and sew. fold in half right sides together and sew the length of the fabric to make a tube. turn tube right side out. press. 3" x 11" prior to sewing)


Turn backpack inside out. Use a seam ripper to open the bottom corner seam just a little. Push the knotted ribbon up through the hole. Use a straight or zigzag stitch to sew diagonally back and forth to secure the ribbon in the corner. Repeat with other ribbon on the other bottom corner.


Turn the bag right side out. Press. - you're finished!

Front:

 Back:


Worn by Piper:


All three girls' backpacks (notice Riley and Piper's have ribbon, but Sophie's has cording):


This has been one of my favorite DIY project yet! I think these bags are adorable and will be tickled pink to see my 3 Little Chicks wearing them on their first day of preschool.

Items Needed (for 1 backpack)
Sewing Machine with thread
Two 12 x 14 pieces of cotton fabric
Two 12 x 14 pieces of lining (I used broadcloth)
Iron on adhesive such as Wonder Under
Pins
Craft Felt
Two 53'' pieces of 7/8" grosgrain ribbon
Safety pin
Scissors
Iron

Saturday, July 23, 2011

DIY Initial Wreath

My in-laws came down to visit us this weekend and I needed to whip up a wreath for the front door to welcome them. With no time left to run to the craft store, I made do with things I found around the house. I had my mind set on making a wreath of some sort with our initial.

An empty diaper box provided the cardboard needed for my initial base. I used a box cutter to cut out two layers of cardboard. Then, I wrapped the two layers of cardboard together with masking tape.


Next, I hot glued leftover fabric onto the initial. This fabric coordinates with the flowers I found hanging out in my craft box.


Finally, I hot glued leaves and flower clusters onto the fabric and finished it with a pink grosgrain ribbon glued to the back.  I smile when I see my initial wreath as I pull into my driveway. This was a simple and free project that only took about 10 minutes to pull together.